A Guide to Radiant Living - Where Wellness Meets Wonder

Wednesday, February 28, 2018

Tuesdays with Kerin: Wednesday with Kerin

Hello World!

Yes, I know today is Wednesday, and Tuesdays with Kerin are supposed to be on Tuesdays. And yes, I know I missed my post yesterday. But are we really surprised? You knew I was bound to miss a post eventually. But alas, the Tuesday post is still happening. Just a day late!

I don't really have anything to update you guys on. I didn't really do anything last week. If I wasn't doing anything, then why did I miss my post? I dunno... I'm lazy.

My DirecTV was installed on Saturday, and so far so good. I did end up seeing Black Panther again, in fact I have seen it 3 times now. I don't anticipated seeing it again in theaters, but you never know.


I did finally see the last Maze Runner, and I really liked it. I haven't written my movie review for this week, so I'll probably post it tomorrow. (Another late post). But let me know in the comments, what movie I should review. I have some options: Fifty Shades Freed, Maze Runner: Death Cure, The Darkest Hour, or Lady Bird. I'm currently participating the Regal Best Picture Film Festival, so I'm watching all the movies that were nominated for Best Picture at the Academy Awards. I was thinking of doing a full dedicated post next week of reviews of all the nominated movies together, but I don't know.


Well that's all for now! See you tomorrow with my review!


If there are any specific posts you'd like to see, let know via comment, twitter, instagram, etc. 

Au Revoir,
~Kerin


P.S. If you have a google account, make sure to hit the follow button on the top left to follow the blog

P.S.S. Follow me on twitter and instagram @kerinskorner to stay up to date!

Monday, February 26, 2018

Maybelline Superstay Full Coverage Foundation: What's The Tea?

Hello World!


I've been dying to get my hands on the new Superstay Full Coverage Foundation from Maybelline, and I finally got to try it!  Here's the look I created  using the foundation, and I think it turned out beautifully. I used the shade 356 Warm Coconut. 


Maybelline is one of my favorite makeup brands, and definitely my favorite from the drugstore, because they do so many things right. And foundation is definitely one of them! I love the Fit Me Matte + Poreless foundation, and this foundation is like the full coverage version of that! When I say full coverage, I mean FULL coverage! A little goes a long way with this foundation. The coverage is incredible, but it's not heavy and blends easily. It feels super lightweight on the skin, and leaves your skin looking flawless. It has a demi-matte finish, but be warned it dries down pretty quickly, so be prepared when you apply it. But once it dries down, it doesn't budge. I mean it doesn't fade or transfer. This is a foundation that doesn't need to be set with powder. I think this foundation will work best for normal to oily skin, since it is matte. It claims to last for 24hrs, but I don't know about that. It does last for long time, though. The shade range is a good start. It comes in 16 shades, ranging from very fair to deep. It's not as extensive as the Fit Me range, but it's better than a lot of brands. And best of all, this foundation is only $10! It's listed at $11.99, but I know you can get for $9.99 at Target and on Amazon! Overall, I think this foundation is great, and a real steal for it's price. I will definitely continue using it, and would recommend it! 

Buy it here!


If there are any specific posts you'd like to see, let know via comment, twitter, instagram, etc. 

Au Revoir,
~Kerin


P.S. If you have a google account, make sure to hit the follow button on the top left to follow the blog

P.S.S. Follow me on twitter and instagram @kerinskorner to stay up to date!

Thursday, February 22, 2018

#TBT Playlist: 2002

Hello World,

Let's just continue this journey into 2002 shall we...


If there are any specific posts you'd like to see, let know via comment, twitter, instagram, etc. 

Au Revoir,
~Kerin


P.S. If you have a google account, make sure to hit the follow button on the top left to follow the blog

P.S.S. Follow me on twitter and instagram @kerinskorner to stay up to date!

Tuesday, February 20, 2018

Tuesdays with Kerin: Movies, Books and Basketball

Hello World,

How's Lent going so far? I've been struggling this first week. I have YouTube set up as an automatic tab, whenever I open my browser, so everyday I'm tempted to just click that tab, and watch some vids! Sometimes, I do open YouTube, and scroll through the new videos that I can't watch. I'm suffering from serious FOMO!

Without YouTube to occupy my time, I've been reading a lot. I finished Hush Hush by Becca Fitzpatrick this weekend, and Matched by Ally Condie yesterday. Both books were pretty good, and I'd recommend them to anyone who's a fan of YA novels. Hush Hush is a supernatural romance/ mystery, and Matched is dystopian romance. I'm looking for new suggestions of books!


For, Galentine's Day, I did actually end up going to the movies, but I didn't see Death Cure, I watched Fifty Shades Freed, again. And for the second time, I still for the life of me, can't figure out what Christian says at the end of the movie. So if you know, please let me know, because I really don't want to have to watch that movie again. 

I did however go to movies again, last week, with the opening of Black Panther being Thursday and all. Usually when anything has that much hype around it, I am unimpressed, but Black Panther deserved it all and more. It really is an excellent film! But enough about it for now. You'll get my full review on Wednesday! 


This weekend was, of course, also NBA All-Star Weekend! I must say I wasn't all that excited for it, but I found it to be a very enjoyable weekend. Even the dunk contest was good this year, despite Lavine and AG not being in it again. Even though, there were a lot of no- name players in the Saturday Night events, it was competitive and entertaining. And so was the All-Star Game itself, which hasn't really been competitive in years. My team, of course, lost, which is unfortunate. But what's even more unfortunate is the fact that I didn't even get to watch the end of the game because Hulu timed out. So if anyone is considering cutting the cord, and switching to Hulu Live Tv,  don't bother! You're better off with Sling, if you really want to cut the cord. But not me. I am putting the cord back. Yesterday, I just ordered service from Direct TV. 

Well that's all for now! See you tomorrow with my Black Panther review!


If there are any specific posts you'd like to see, let know via comment, twitter, instagram, etc. 

Au Revoir,
~Kerin


P.S. If you have a google account, make sure to hit the follow button on the top left to follow the blog

P.S.S. Follow me on twitter and instagram @kerinskorner to stay up to date!

Monday, February 19, 2018

Makeup Monday: Chocolate Monochromatic Look

Hello World!


I created this look for the e.l.f. Beautyscape contest, so here's the tutorial on how I created this Chocolate Monochromatic Look!

Step 1: Prime! I have oily-combination skin, so I like to use two different primers - a hydrating one and a mattifying one. I first used the Urban Decay Quick Fix Complexion Prep Priming Spray all over my face, and then I applied the Benefit POREfessional Matte Rescue gel  in my T-zone.


Step 2: Foundation!  I used e.l.f. Aqua Beauty Mouse Foundation, but since I wanted a little more coverage, I mixed in the Urban Decay Velvetizer Translucent Mix-In Medium.


Step 3: Concealer! I applied concealer to brighten my undereye area and cover any dark circles and to highlight the bridge of my noseI used  the Maybelline Super Stay Better Skin Concealer + Corrector in the shade Medium/Deep.  I let my concealer sit for while before blending it out, so I can get maximum coverage! 


Step 4: Eyebrows! While waiting I'm waiting for my concealer, I filled in my eyebrows! I used Benefit Goofproof Brow pencil in the shade Deep -06 to fill in by brows and then set them with Benefit 24-Hr Brow Setter.


Step 5: Powder! I  blended out my concealer, and immediately set it with powder! I used MAC x PatrickStarr Patrick's Powder.  I baked under my eye, and also dusted the powder all over my face to set my foundation. 

Step 6: Bronzer!  I applied bronzer to the perimeter and contours of my face. I used the darkest shade the Tarte Clay Play Face Shaping Palette


Step 7: Eyes!  I first applied the MAC Pro Longwear Paint Pot in the shade Groundwork all over my lid as an eyeshadow base and primer. I used two different palettes for this look. I first used the shade, Sundae Funday (medium neutral brown) , from the Beauty Bakerie Eyescream Palette, and I blended that color into my crease. I then used the shade, Drive thru (warm dark brown), from that same palette, and blended that into my crease, focusing on the outer corner. Lastly, I applied the shade Peach Tart, from the Too Faced Just Peachy Mattes palette, all over my lid.

Step 8: Highlight!  I applied highlighter lightly to the tops of my checks, browbone, and bridge of my nose. I used the Becca Shimmering Skin Perfector in the shade, Opal. 


Step 9: Set! I used the Boscia White Charcoal Mattifying Setting Spray  to set all the powders on my face. 


Step 10: Eyeliner and mascara!
  I applied liner to both tmy op and bottom lash line and I used the Marc Jacobs Highliner Gel Crayon in the shade Rococa (golden brown). I then followed that with the L'oreal  Voluminous Lash Paradise mascara. 


Step 11: Lips! I finished the look off with the Sephora #Lipstories Lipstick in the shade Fireside.

Step 12: Selfie! Share on Facebook, Instagram, Snapchat, kerinskorner.com, etc. 


Happy Makeup Monday!
~Kerin


P.S. - Follow me on Instagram (@kerinskorner) to see all my makeup looks!

Friday, February 16, 2018

Kerin's Top 10: NBA All Stars 2018

Hello World,

Happy NBA All Star Weekend! 

Today is the first day of All Star 2018! *cheers and applause* I don’t know about you, but I’m only moderately excited, but nonetheless here’s my list of the Top 10 All Stars, or Top 10 best players in the league today.  Also, I’m including players that were voted or selected to be All Stars, regardless of injury or if they’ll actually play in the game on Saturday.


10. Klay Thompson – Golden State Warriors

9.  Giannis Antetokounmpo – Milwaukee Bucks

8. DeMarcus Cousins – New Orleans Pelicans

7. John Wall – Washington Wizards

6. Anthony Davis – New Orleans Pelicans

5. Kyrie Irving – Boston Celtics


4. LeBron James – Cleveland Cavaliers

3. James Harden – Houston Rockets

2.  Stephen Curry – Golden State Warriors

1. Kevin Durant – Golden State Warriors


And that’s it. Be sure to look out for most of these guys on Sunday night! By the way I’m going for Team Stephen! It was a hard decision because Team LeBron got all the good players, but I’m not saying I’m anti - LeBron, but I’m definitely not pro- LeBron. 


If there are any specific posts you'd like to see, let know via comment, twitter, instagram, etc. 

Au Revoir,
~Kerin


P.S. If you have a google account, make sure to hit the follow button on the top left to follow the blog

P.S.S. Follow me on twitter and instagram @kerinskorner to stay up to date!

Thursday, February 15, 2018

#TBT Playlist: 2001

Hello World,

Today I decided to continue our journey through the 2000s decade. So here's a playlist of my favorite songs that were released in 2001! Enjoy! (BTW You can 60 days of Spotify for free! Click Here!)


If there are any specific posts you'd like to see, let know via comment, twitter, instagram, etc. 

Au Revoir,
~Kerin


P.S. If you have a google account, make sure to hit the follow button on the top left to follow the blog

P.S.S. Follow me on twitter and instagram @kerinskorner to stay up to date!


Tuesday, February 13, 2018

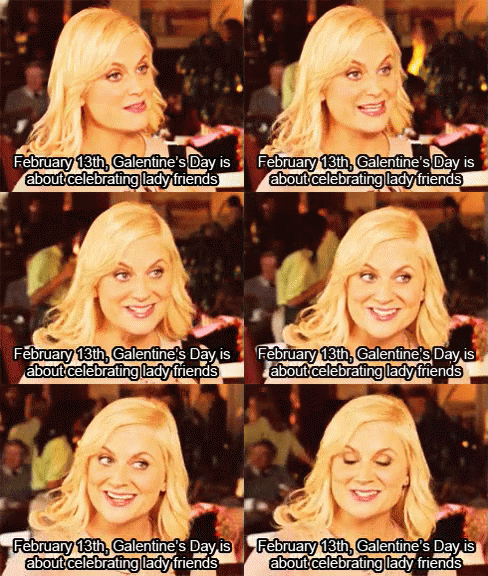
Happy Galentine's Day!

Hello World,

Happy Galentine's Day! 


Get excited that means tomorrow is Frederick Douglass's Birthday! How will you celebrate?  Today is also Mardi Gras in some circles, so Happy Mardi Gras, I guess... Anyway, since it is Galentine's Day, today is the perfect opportunity to get together with girlfriends and have some fun! I'll probably be catching a movie with my sister! I'm thinking Maze Runner: Death Cure, but I don't know. 

Monday, February 12, 2018

Makeup Monday: Natural Glowy Look

Hello World!

Lately, I've been rocking a version of this look everyday. I wear it to school, to work, to the movies, to bed... Anyway here's how I got this everyday natural glowy glam look. Enjoy!


Step 1: Prime! To really get that natural lit from within look, first use an illuminating primer. I used the Laura Mercier Foundation Primer -  Radiance. If you have oily skin, like me, follow with a mattifying primer in the areas you get oily. I applied the Benefit POREfessional Matte Rescue gel  in my T-zone. 

Step 2: Foundation! You'll want to use a foundation with a more natural finish, rather than a matte finish, so your face doesn't look flat, so you still have that natural glow. I used the new NARS Natural Radiant Longwear Foundation in the shade Belem. 


Step 3: Concealer! Use a concealer to brighten the undereye area and cover any dark circles, but only go 1-2 shades lighter than your foundation color. Also highlight the bridge of your nose, by applying concealer there.  I used the NARS Radiant Creamy concealer in the shade Walnut.  Let your concealer sit for while before blending it out, so you can get maximum coverage! 


Step 4: Eyebrows! While waiting you're waiting for your concealer, this is the perfect time to do your eyebrows! I used Benefit Goofproof Brow pencil in the shade Deep -06 to fill in by brows and then set them with Benefit Gimme Brow.


Step 5: Powder! Now you can blend out your concealer, and immediately set it with powder, so it doesn't crease! Apply just enough translucent powder to set your concealer, and then dust it away. No baking, since this is a more natural look. I used MAC x PatrickStarr Patrick's Powder


Step 6: Bronzer! Use a very warm bronzer, preferably one with a shimmer, so you have even more of a glow. Apply the bronzer to the perimeter and contours of your face. I used Beauty Bakerie Coffee & Cocoa Bronzer palette and I applied it under my cheekbones, to my temples, and along my jawline.

Step 7: Highlight!  Use a gold or champagne color highlighter and apply liberally to places you'd like to highlight. I again used the  Beauty Bakerie Coffee & Cocoa Bronzer palette. Using the highlight shade, I applied it down the bridge of my nose, the top of my cheekbones, and creating a "c" shape, I swept the highlight from my cheekbones to my brow-bone. I also highlighted lightly above my eyebrows and using the same "c" shape motion I connected it to my cheekbone highlight. 

Step 8: Eyes! Apply your bronzer into your crease, to give your eyes more depth and warmth. Then using your finger apply your highlighter directly in the center of your lid all the way up to your brow-bone. 

Step 9: Set! Because we don't want all that hard work to go to waste, now it's time to set it and forget it. First use a mattifying setting spray to lock everything in place, and then follow with a dewy setting spray, so you have a nice glowy look. I used the Boscia White Charcoal Mattifying Setting Spray and the Urban Decay Quick Fix Complexion Prep Priming Spray


Step 10: Eyeliner and mascara! Try to use a brown or other warm colored eyeliner, because black can look a little harsh with this look. Then use a lengthening mascara, not thickening, so it looks more natural. I used the Marc Jacobs Highliner Gel Crayon in the shade Rococa and Tarte Tarteist Lash Paint Mascara

Step 11: Lips! Finish off the look with a clear gloss. I used the Too Faced Lip Injection Power Plumping lip gloss.
Step 12: Selfie! Share on Facebook, Instagram, Snapchat, kerinskorner.com, etc. 


Happy Makeup Monday!
~Kerin


P.S. - Follow me on Instagram (@kerinskorner) to see all my makeup looks!

Friday, February 9, 2018

Kerin's Top 10: Must Have Makeup Brushes

Hello World!

Since in the world that is Kerin's Korner, this week started on Tuesday, there was no Makeup Monday this week. ☹ So I thought I just sneak a cheeky little makeup post in today! Don't worry, it's still a Top 10, so I'm not breaking any rules.  Anyway here's the top ten makeup brushes and tools, I think every makeup user needs to have in their kit.

1. Flat Top Kabuki Brush

Perfect for blending out liquid and cream products! It makes your job easier and quicker and leaves you with a flawless, airbrushed finish! I use it for foundations, but it could also be used for cream contour and blush. Just about every brand makes a version of this brush so you can find it anywhere. I personally really like the one from Real Techniques.

2. Flat Foundation Brush

Great for blending out cream products! Perfect if you want full coverage! I like to use it to blend out my under-eye concealer, so I can get maximum coverage. This is also great for baking, because it's so dense and flat, so you can really pack the powder right under your eye. And the rounded edge is perfect for getting into the corners of your eye! I like to use one side to blend out my concealer and then I flip to the other side to apply my powder for baking. You can find this brush from a lot different brands. e.l.f. makes a great one for only $2! My favorite is from Tarte in their Artful Accessories Brush Set.

3. Velour Puff 

Absolute must-have for loose powders, but good for pressed powders as well! The thing about loose powders is they can be very messy. But the puff is perfect for picking up and applying powder, with minimal mess. And it molds perfectly to your face for easy application. I use it for my baking powder and to set my face, because I can really pressed the powder into my skin, so my makeup will last longer.  Laura Mercier makes hands down the best one!


4. Large Powder Brush

You want to look for large fluffy brush with a dome-shaped head. This brush is perfect for a diffused application of powder products over larger areas of the face. And great for blending everything together! After I finish my makeup, I like to sweep this brush all my face with no product on it at all or with a little translucent powder, just to blend all the other products together. This brush is also great for correcting mistakes! Just take this brush and a little translucent powder and blend away any  excess blush, contour, etc. I also like to use this brush to apply blush and contour/bronzer. This brush is also very easy to find.  e.l.f. makes a great inexpensive one!

5. Angled Eyeliner Brush


The angled end makes it perfect for creating a precise line! It's great for gel and liquid liner, but also good for eyeshadows and powders. It can be use for precise application of eyeshadows. I also like to use this brush to fill in my eyebrows. The angled end makes it easy to create hair-like strokes, for a more natural looking brow! Every brand makes a version of this brush! Morphe makes one for just $2!

6. Tapered Eyeshadow Blending Brush


This brush is perfect for blending out eyeshadow! Because it's so fluffy, but still dense, it'll blend out your eyeshadow perfectly, but still provide you with excellent color pay-off. And it can used with both cream and powder eyeshadows. I like to use this brush to blend eyeshadows into my crease and to buff out the edges, so my eyeshadow looks more diffused. A lot brands make a version of this brush, but I really like the one from Luxie!


7. Precision Shader Brush

Can be used for cream and powder eyeshadows! The slightly pointed end gives you full control when applying color. I like to use it to apply color to my eyelid and for precise application of dark colors into the outer corner of my crease.  This brush is a little harder to find, but a lot of high-end makeup lines carry this brush. I know Make-up Forever and MAC make a version, but I really like the one from Luxie, sold exclusively through ispy. 

8. Flat Definer Eyeshadow Brush

This a versatile, multipurpose eyeshadow brush! It can used to pack on color on your lid, apply precise eyeliner, and smudge your lower lash line. I also like to use this brush to fill in my eyebrows. The straight edge makes it easy to create hair-like strokes, and it's dense enough to apply a lot of color! This brush is easy to find from a lot of brands! e.l.f. makes a good one for only $3!

9. Tapered Highlighting  Brush

Best brush for highlighting! You want to look for a dense brush with a tear-dropped shaped head. The precise tip makes it easy to apply highlight to the upper contours of your face, your brow bone, and the inner corner of your eye. I use it for all of the above! I love this kind of brush because it allows you to build up the highlight to a mega-watt glow or you can diffuse the product for a more subtle glow.  This brush is also fairly easy to find, but I really like the #3 brush from the BH Cosmestics collaboration with ItsMyRayeRaye brush set!

10. Makeup Sponge

Last but certainly not least, the makeup sponge! No makeup kit is complete without a makeup sponge. Sponges are great at blending out cream and liquid product, and they'll give you a more natural look, because they suck up excess product. The only drawback is that they are so hard to clean. A lot brands make sponges, and a lot of them are bad. The beautyblender and the Real Techniques Miracle Complexion sponge are the best! I like the Real Techniques one better because it has a flat edge, that works great for baking. 


If there are any specific posts you'd like to see, let know via comment, twitter, instagram, etc. 

Au Revoir,
~Kerin


P.S. If you have a google account, make sure to hit the follow button on the top left to follow the blog

P.S.S. Follow me on twitter and instagram @kerinskorner to stay up to date!
Blog Design Created by pipdig